Feeds:
Posts
Comments

Duck Confit


Duck Confit

Hi. My name is Alyssa and I have a problem. If there is duck on the menu, I need to order it.

I’m not sure where this compulsion stems from. That being said, there could be worse addictions than duck-ordering, so I accept it for what it is. The only fault I will admit is being a lover of good food and a little close-minded when it involves menus and duck.

Eventually a learning opportunity was born out of this duck fetish when my obsession lead me to one question.  If you love duck so much, and you love cooking so much, then why don’t you make the duck at home? Yeah. Why not?
Duck ConfitSo, a few months ago I purchased a duck share from Cooks of Crocus Hill in Saint Paul. The share hailed from Au Bon Canard, a duck farm in Caledonia, Minnesota. They specialize in Foie Gras (another guilt-ridden love of mine), and it appears that you can order that directly from them. I’m not sure if they’ll sell you a whole duck directly, or if they distribute only to restaurants and specialty food stores, like Cooks. Worth a shot. Great duck.

It came with 4 legs/thighs, 18 wings, and a couple of balls of duck lard. Yeah, I said it. Duck lard. Naturally, I decided to make a confit. What else is one supposed to do with legs, thighs, and excessive amounts of duck fat?

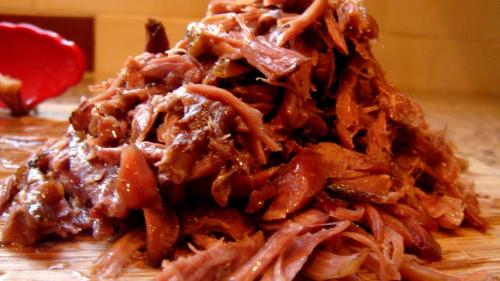
Duck Confit melts in your mouth. No need to fork and knife it. Mine would have fallen apart from the bone if the wind blew the wrong way. Duck Confit is cured duck leg and thigh that is slow cooked in fat. I know, I know. It sounds kind of gross. But it tastes so good.

Making Duck Confit takes two days. Don’t be scared, you really just let it sit overnight and in the oven for 12 hours. You can go about your daily routine while the duck feast is being made.

Ingredients:

2 duck legs with thighs attached

Excess duck fat

2 cups olive oil

 Handful of dried bay leaves

Salt

Pepper

Recipe: Duck Confit
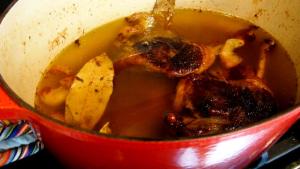
 Generously salt non-skin side of duck thighs. Press Bay leaves into one of them, and sandwich the two together.

Now salt outer, skin side, of duck portions.

Put fat in bottom of a coverable container. Place sandwiched duck thighs on top. Cover, and store, refrigerated, for 24-36 hours.

The next day, turn oven to 200 degrees. Remove duck from air-tight container. Remove bay leaves and set aside. Rinse salt off duck and pat dry.

Place bay leaves and duck fat on bottom of cast-iron pot. Place duck thighs, skin side down, on top. Salt generously. Add some pepper too.

Cover and cook for 12 hours.

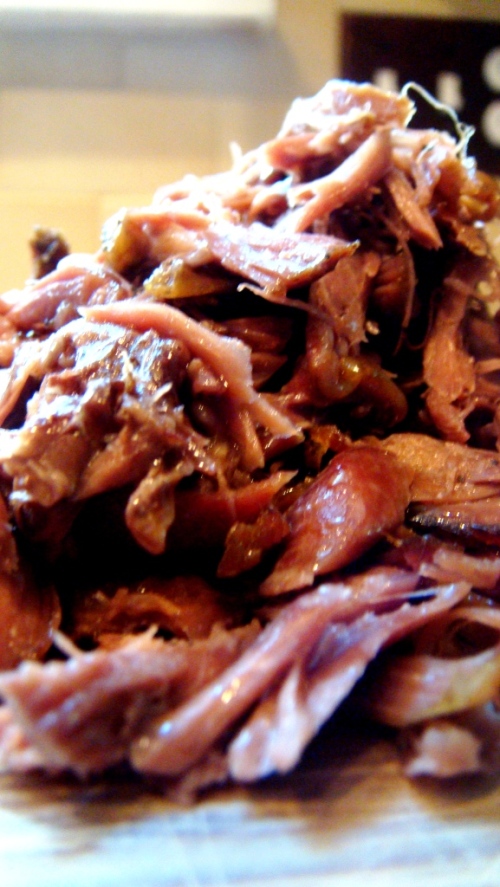
Remove and pull duck meat froDuck Confitm bone. Separate fat. Store in an airtight container and pour liquid from pot on top until covered. Duck can remain refrigerated for future use for a few weeks. When you’re ready to eat it, take out however much you’d like and warm up in a pan. You can eat this alone or put it in another recipe.

Enjoy!
Duck Confit

Panna Cotta

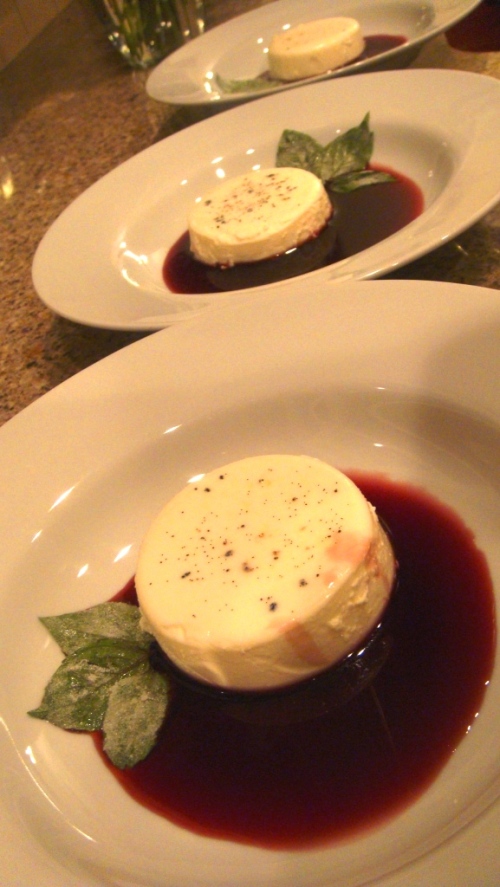
Ok, about a dozen recipes are in line to be added on the blog, but after the feedback from last night I had to add this one right away.  Panna Cotta is an Italian dessert, and literally means, “cooked cream”. And that is, quite simply, about all there is to it. It’s simple and cheap, and if properly plated, sure to impress dinner guests.

The only drawback is that it needs to be prepped at least four hours prior to eating. But to be honest, the early prep diminishes any stress you might have during that small window of time post-dinner and pre-dessert. Once you’re ready to eat, all you need to do is plate everything.

If you’re using the basil leaves, they need to dry for six hours prior to serving. You could make the basil leaves and panna cotta at the same time, and let the panna cotta sit, covered and refrigerated, for an extra two hours. You can make the red wine sauce ahead as well.

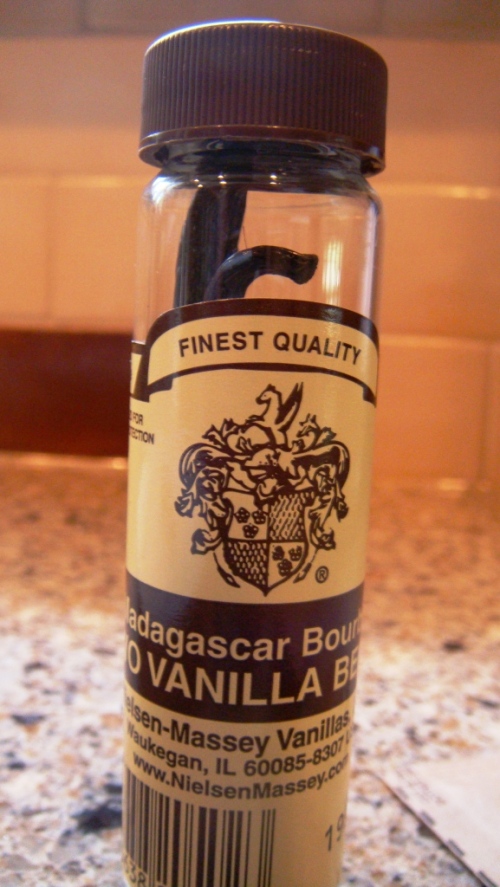
Vanilla BeanI combined a few recipes to make this one. They came from Food and Wine, David Lebowitz, and several of my cookbooks at home. 

The key here is using a fresh vanilla bean, rather than extract. Not only does it add a whole dimension of flavor, the flecks of bean are quite pretty.

Vanilla is a member of the orchid family, and one of the more high-priced spices out there. It grows much like a vine, crawling up an already existing tree.  It takes nine months to mature enough for harvest. When packaged, they look much like a very long brown bean that happens to have an incredibly fragrant aroma.

This recipe serves eight.

Ingredients:

24 basil leaves

1 egg white

Fine cane sugar

2 cups red wine

1/2 cup plus 10 tablespoons sugar (I used sugar in the raw)

4 cups  heavy cream

Half a vanilla bean

6 tablespoons cold water

2 packets gelatin

Recipe:

First, rinse and pat dry basil leaves. Crack egg, and over a small bowl, pour yolk back and forth between each half shell to separate white from the yolk. Whisk egg white until it becomes frothy.

Late August 2009 052

Egg WhiteEgg White

Now, brush egg white on both sides of basil leaves.

Panna Cotta

Sprinkle fine cane sugar on both sides of leaves.

Cane Sugar

Dry sugar-crusted leaves, on a rack, for six hours.

Basil

Pour cream into a deep pan. Add sugar and stir to dissolve.

Panna CottaPanna Cotta

Heat, over medium setting, until sugar is dissolved. Meanwhile, split the bean and using a sharp knife, scrape out the seeds. Put seeds and bean into pan, remove from heat, and cover for 30 minutes.

Vanilla BeanVanilla Bean

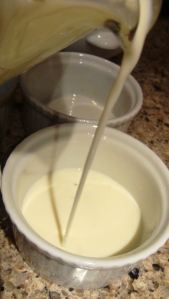
Add gelatin to the cold water and let it sit. No need to stir it in. After the thirty minutes have passed, whisk gelatin into cream mixture.  Lightly oil eight ramekins, coffee cups, or small bowls. Pour mixture in to them. Store in refrigerator for at least four hours, until ready to serve.

Panna Cotta

Now, pour red wine into a saucepan. Turn heat to medium and stir sugar in, until it dissolves. Red Wine SauceHeat and stir until it reduces by half, for about 10-15 minutes. Pour into airtight container and refrigerate.
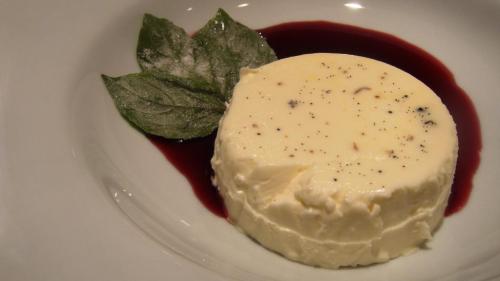
Once you’re ready to serve, pull everything out of the refrigerator. Slide a sharp knife along the inside of the ramekin, or whatever container you are using. Flip over your serving plate, and lightly shake it so that it slides out onto the plate.

Pour sauce on the side, and garnish each plate with three basil leaves.

Delicious!

Panna Cotta

Minnesota Fish Fry

Phil and Alyssa Fish

Initially I thought I would have more time to post this prior to summer ending. But with the recent change in weather, and the impending fall season pounding on our door, I decided it was high time to get this online. We woke up to a very chilly morning today, perfect for a few cups of steaming hot coffee and a solid hour of reading the NY Times. Looking at the calendar and outside our window, I would assume it was still summer. It’s not. I’m only a little bitter. Fall is my favorite season, but it’s really not fair for it to start in August.

My husband and I caught a lot of walleye this summer at my family’s cabin on Lake Vermillion. The walleye was named in honor of, guess what, its eyes. They reflect light and look luminescent. They have sharp eyesight and are therefore able to see clearly in the dark, deep waters of a lake. They’re also delicious, and during the summer season it’s on nearly every menu in the city.

I think a state residency rule should exist as follows; If you haven’t fished for walleye, eaten walleye, or used Shore Lunch to cook walleye, at some point in your life, you can’t call yourself a Minnesotan. It is our state fish, after all.

Earlier in the summer, our buddy Phil, a fishing guide in the area, took us out for a day of walleye nabbing. Phil’s been fishing in the area for 30 plus years.  He’s a lake lifer and a lover of the outdoors. If you’re ever in Northern Minnesota and interested in  fishing all the honey spots plus having a second pair of experienced hands do all the dirty work, I strongly encourage you to get in touch with Phil. His contact info and bio are at the following site – first guide in the directory.

http://www.lakevermilionguidesleague.com/Meet_the_Guides.html

Mike's FishAlyssa'a FishWe like to cook it up in the classic fisherman style. Shore Lunch all the way. I also made a cilantro/scallion coleslaw to accompany the fish. You can eat this on the side, or pile it up in a walleye sandwich.  Thick, toasted hoagie, shore lunch walleye, melted cheese, fresh sliced tomato, coleslaw…. yum.


 Walleye

 My only recommendation in using Shore Lunch is to soak the fish in egg and milk for at least two minutes prior to breading and frying. Also, practice makes perfect with the heat. I found this out the hard way when I unintentionally made three different styles of walleye.

1. Version One:

  • The oiled pan was too hot. So I cooled it down. Went from high to low. The result was mushy breading, longer cooking time.

2. Version Two:

  • Then, it was too cool, so it turned it to medium/high heat. Result? Perfectly crunchy breading, flaky white fish.

3. Version Three:

  • Eventually became too hot, and I just left it. The fish was a darker brown than I would have preferred it to be.

Unintentional experiment conclusion? Even if you’re in a rush, don’t immediately turn heat to high. Keep it at medium/high and then after a few minutes turn it down to slightly above medium. Walleye

Tartar sauce is always a sweet go-to dipping accompianment to this fish.

Here’s the recipe for the coleslaw. I found it in the Summer Entertaining edition of Cooks Illustrated. I also added some chopped pea pods from our garden. Nice addition thanks to the added crunch. This recipe serves 12.

coleslawIngredients:

3 pounds red or green cabbage, shredded

3 medium carrots, shredded

3/4 cup buttermilk

3 tablespoons mayonnaise

3 tablespoons sour cream

1 shallot, minced

1 1/2 teaspoons lime juice

3 tablespoons cilantro, minced

3 or 4 scallions, sliced thin

3/4 teaspoon sugar

1/4 teaspoon black pepper

1 tablespoon salt

Recipe:

Toss cabbage and salt  together in large bowl. Let it wilt at room temperature for about an hour.

Rinse under cold water, and press to drain. Dry with paper towels.

Mix cabbage and carrots. Stir the rest of the ingredients together and pour over cabbage, carrots, and anything else you might have added. (Remember the pea pods?)

Enjoy!

Coleslaw

Homemade Whipped Cream

Whipped Cream

There’s really no reason to settle for store-bought whipped cream when making your own is so easy, and more than worth the minute amount of work you need to put into it. Plus you can create your own version to satisfy your tastes. I like putting natural vanilla extract or honey in mine. I haven’t experimented with any other flavors yet. Sticking to the classics for now. Although I am tempted to whip up something different using spices like curry or nutmeg. Chai also sounds yummy, in anticipation for Fall.

Ingredients:

Heavy whipping cream

Handheld mixer

Flavor additives of your liking

Recipe:

Pour cream into a deep bowl. Add your flavoring. Whip, using your hand held mixer, for a minute or two, until it becomes fluffy. Don’t over-whip. It will turn into butter. Unless that sounds good to you. What’s wrong with butter? Whip away.

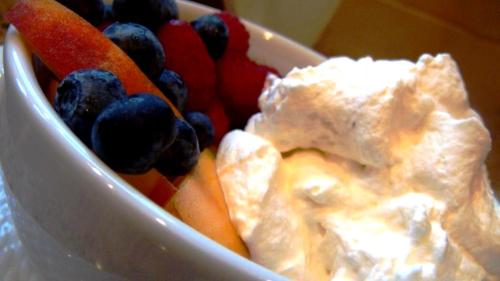
You can store whipped cream, covered, for several hours in the refrigerator. Enjoy on fresh fruit, waffles, sweets, or straight-up off your finger.

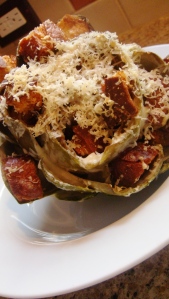
Stuffed Artichoke

Stuffed Artichoke

This was the FIRST recipe I ever learned. I must have been about twelve. My parents and I went over to Maui every year growing up, (ahhh – the perks of being an airline kid). It was a tradition that during our first night in town, we would take our jet-lagged bellies over to Jameson’s at the Kapalua Resort.

No matter how tired we were, or how late our flight had arrived, we could always depend on satisfying our hunger at  Jameson’s with JJ’s famous artichoke. Since that time, the Kapalua was taken over by Ritz Carlton and Jameson’s was replaced with a new restaurant. I miss the old school Jameson’s very much. But I remind myself that I will always have the artichoke. And nobody can take that away from me. Artichoke

So here’s my artichoke story. JJ was a longtime employee at this restaurant, and rumor is he developed this masterpiece after a long day’s work, few ingredients to choose from, and severe hunger pains. In my version, he’s had a few Mai Tai’s as well, which boosted his creativity.

I would rave to the waitstaff about how much I loved the artichoke. One lucky night, they offered to take me back into the kitchen, to meet JJ, and watch him make an actual stuffed artichoke!! A childhood dream fulfilled. I sat in the kitchen, bewildered and amazed, as I watched him work his magic on our order. Then I was shuffled back to the table, where I anxiously awaited our artichoke. He even delivered it to us himself.

Alyssa and JJ

Last December, my husband and I went back to Maui with my dad. There we were, at one of the new restaurants on the Kapalua property, when JJ himself came over to our table. I was ecstatic. I even got a picture with him. I tried to explain the effect his artichoke had on us. I hope he got it and didn’t think I was totally nuts.

I’m not promising healthy eating here, people. But I can guarantee that each bite of this treat will send you right up to pig heaven on a first class ticket. Yum.

Ingredients:

1 artichoke, stemmed and leaves trimmed

Marie’s Creamy Italian Dressing

Butter

Freshly grated Parmesan cheese

Baguette

Olive Oil 

Recipe:

Turn oven to 350 degrees. Chop up baguette into bite size pieces, drizzle with olive oil, and bake for about 10 minutes until golden brown and crunchy looking.

Meanwhile, prepare a large pot of water and set over high heat to boil.

ArtichokeArtichoke

Cut the stem off the artichoke.

ArtichokeArtichoke


Trim the sharp points of the leaves off. Trim the top part of the artichoke off, using a knife.

August 2009 052Artichoke

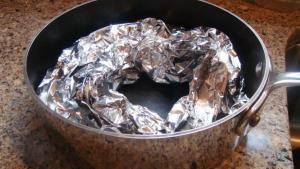
Now, line an ovenproof dish with aluminum foil. Make a circle large enough for the artichoke to rest in it.

Artichoke

Once water is boiling, drop artichoke in and cover with a lid. Steam for about 20 minutes. Drain waiter from artichoke.

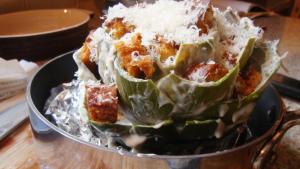
Put artichoke in foil bed, and stuff leaves with croutons. Put a few pieces of butter in leaves. Drizzle Creamy Italian dressing all over artichoke. Make sure to get it in leaves. Sprinkle with Parmesan.

Bake, uncovered, for about 15 minutes.

Enjoy!!

Artichoke


Tomato Soup

I was ecstatic last week when I saw how many ripe, red tomatoes were waiting to be picked in our garden. This year’s harvest is a little late, but not to complain. There are plenty of recipes for fresh tomatoes. And coming from your backyard is as local as you can get.

TomatoesAnatomically, tomatoes should be classified as a fruit. A Supreme Court ruling at the end of the 19th century found that tomatoes are, in fact, a vegetable. At the time, an import tariff existed, that applied only to vegetables. So, when a clever man started bringing in tomatoes under the “fruit” label, the court was quick to put an end to it. Their basis for decision? Linguistic reasoning. Tomatoes were found to be, “usually served at dinner in, with, or after the soup, fish , or meat” (McGee).

McGee, Harold. On Food and Cooking: The Science and Lore of the Kitchen. New York: Collier, 1984.

I love a good tomato soup, especially once the weather turns cold. Growing up, my mom used to make a “sick day” meal for me that consisted of two simply delicious things; tomato soup and grilled cheese.

This recipe is perfect for summer, however. It was almost like a gazpacho, in that there were little chunks and grains of fresh tomato in it. And rather than a grilled cheese sandwich, I made Parmesan croutons to put on top. Tomato SoupIt comes from Ina Garten’s newest cookbook, Back to Basics. It provided my husband and I with two dinners, and one lunch for myself.
Ingredients:

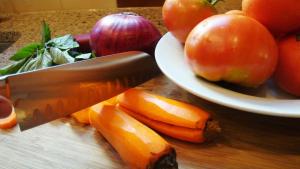
1 1/2 cups chopped red onion

2 carrots, peeled and chopped

1 tablespoon freshly minced garlic

4 pounds tomatoes, chopped (5-6  medium/large)

Tomato Soup1 1/2 teaspoons sugar

1 tablespoon tomato paste

1/4 cup chopped basil

3 cups chicken or vegetable stock

3/4 cup heavy cream

Baguette

Olive oil

Grated Parmesan (preferably freshly grated)

Salt and Pepper

Recipe:

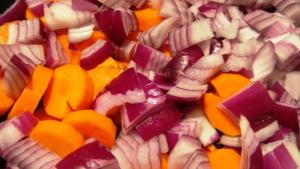
Heat 2 tablespoons olive oil in a large, deep pot over medium/low heat. Add onions and carrots and cook for about 10 minutes, until soft. Add garlic and cook for 30 seconds to 1 minute, until fragrant. Tomato Soup

Add tomatoes, sugar, basil, tomato paste, stock, 1 tablespoon salt, and 2 teaspoons pepper, and stir to mix.

Bring mixture to a boil, then turn heat to low and let simmer, uncovered, for about 40 minutes.

Meanwhile, preheat oven to 400 degrees. Slice baguette into 1/4 inch slices. You can use however much you’d like, and save the rest by storing it in the freezer and reheating in the oven for later use.

Parmesan CroutonPut slices on baking sheet. Drizzle or brush with olive oil. Sprinkle parmesan on top. You can use a lot here Bake for about 5-10 minutes, until cheese is golden brown on top. Remove from oven.

Once soup has simmered for 3-40 minutes, add the cream and process the entire mixture through a food processor, blender, or food mill.

Reheat once ready to serve. Place Parmesan croutons on top.

Enjoy!

Herb Butter

We have an herb garden in our yard and no matter how hard I try, I just can’t seem to catch up with using everything at the rate it is growing. So, I thought a simple and easy way to put these herbs to use would be to incorporate them into a butter. You can spread it on rolls, use it in scrambled eggs, or even as an added flavor to steamed vegetables. (My absolute favorite herb to put in butter is cilantro. Rub it on corn on the cob, with a little sea salt and pepper. Amazing).

Herb Butter

Ingredients:

1 stick unsalted butter

Handful of fresh herbs (I used parsley, basil, rosemary, and chives)

1 or two garlic cloves (optional, I love garlic so anytime I can use it I will)

Salt and pepper


Recipe:

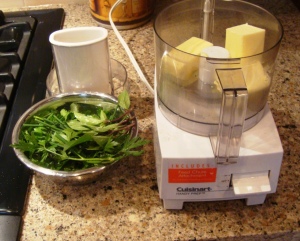
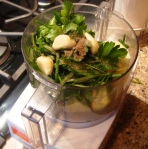
It’s quite simple. Put all the ingredients into a food processor, and process until smooth. About 30 seconds-1 minutes. (Trust me, nobody wants to eat a big chunk of uncooked garlic so don’t hesitate to over-process).

Herb Butter

If you don’t have a food processor, you can make this as follows.

Leave butter out to soften at room temperature. Meanwhile, chop herbs and mince garlic.

In a small bowl, preferably using a rubber spatula, mush herbs and garlic into butter. Add salt and pepper, to taste, and stir it in as well.

Now, I like to roll my butter up and slice it off as needed. Take a sheet of aluminum foil and plop butter on top. Roll up foil so the butter forms a cylinder shape. You can twist the sides of the foil to close the ends. Once it has set, you can also remove and put onto a butter dish, refrigerated. Otherwise, simply slice off the desired amount from your foil roll on an as needed basis.

Enjoy!

Herb Butter on Rolls

Miso soup

Health Benefits of Miso Soup

Miso begins as a substance made of soybeans, sometimes mixed with grains (ex; rice, barley). The mixture is injected with  yeast mold, and ferments anywhere from a few weeks to years, depending on the type of miso. Then it is mashed up into a pasty mixture. It is an excellent source of protein, Vitamin K, Vitamin B12, Zinc, and Copper, (some of those pesky nutrients that are so beneficial yet sometimes hard to find in our daily foods).

In addition, Miso is also considered to have a positive influence on one’s digestive tract. It has high levels of fiber, and because it is fermented, is rich in probiotics. I recently read a Q & A in Martha Stewart’s Body and Soul magazine that asked prominent doctors what they ate for breakfast. One of the responses, from a cheery looking M.D., was steamed rice and a bowl of miso soup, in addition to some salmon, vegetables, and green tea. Most likely a good route to take at the start of your day. Perhaps I’ll try this next week. Miso is price conscious, and simple to make. You could create a big batch on Sunday, and there is breakfast for a week!

This serves four.

Ingredients:

 4 cups water

2 teaspoons powdered dashi

4 tablespoons miso

6 ounces of tofu, cut into squares

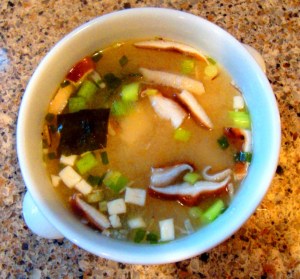
Mushrooms of your choice, sliced thin (I like shitake and regular white)

A few scallions, sliced thin

Seaweed sheet, sliced into one-inch pieces (optional)

Recipe:

Bring water and dashi to a boil in a medium pot. Add tofu, mushrooms, and seaweed (if you are using).

Turn heat to low and let simmer for a few minutes. Stir in miso. Add scallion and enjoy!

Miso Soup

Lamb baked in foil

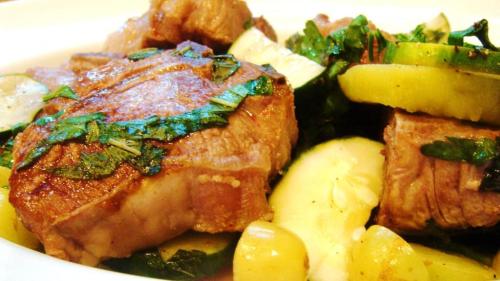
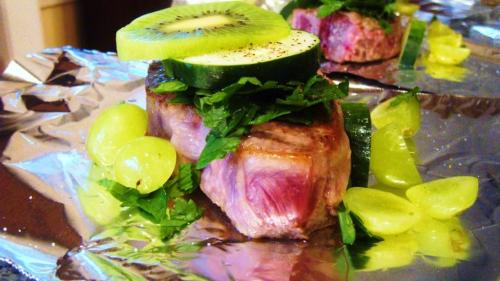
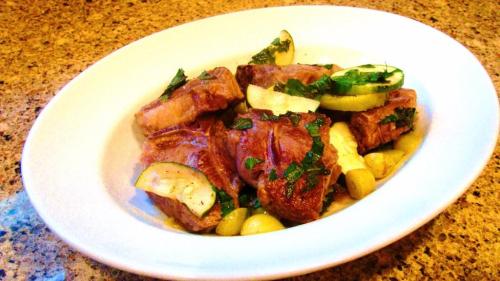
I love lamb. This recipe is so yummy. I sear the chops at high heat in a pan with a little olive oil, then bake them in foil with some fresh fruit, vegetables, and herbs. The outside is crispy and the inside is juicy, thanks to the moisture from the produce.

An interesting point. I would have though lamb to be less fatty than beef and pork. However, according to my food resource book, it is less fatty than pork, but a little bit more than beef.

This recipe comes from the Silver Palate Cookbook. It serves 3.

Ingredients:

6 lamb chops

Salt and Pepper

2 kiwis

2 cups red or green grapes

1 bundle asparagus

1 cucumber

1/3 cup chopped fresh herbs (mint and parsley, or whatever you prefer)

Olive oil

Aluminum foil

Recipe:

Preheat oven to 350 degrees. Heat about a tablespoon of olive oil in a medium/large pan. Heat should be at medium-high temperature. Let the pan warm up for a few minutes. Be careful – it’s HOT.

Lamb Lamb

Now, salt and pepper both sides of the lamb. Brown in pan, over high heat, for about 2 minutes per side. Again, the pan is hot, so be careful of any oil spattering. If it’s too hot, turn the heat down a little.

Remove lamb from heat. Cut foil into six even pieces, large enough to wrap individual lamb, plus fruits and vegetable.

LambPeel and slice kiwis and cucumber.

Chop grapes in half.

Trim asparagus and cut into two-inch pieces.

Chop the herbs.

Place each lamb chop on their own piece of foil, and scatter fruits and vegetables on top and around. Sprinkle herbs on top.

Wrap the foil up into a tight ball, and put in oven to bake, either directly on the rack or on a baking sheet.

Bake for about 20-25 minutes, depending on how you like your lamb. I prefer mine pink, so I leave the lamb in close to 25.

Remove, unwrap, and enjoy! You can plate the meat with the fruits and vegetable, if you like.

Lamb

Cooking Club

The Girls

This story takes place almost one year ago.

Last September, I was out enjoying a gigantic German beer during Oktoberfest with three of my girlfriends. There we were, huddled up on two giant, wooden, Deutsche Bierhaus benches, brainstorming activities that didn’t revolve around the the meat market that is the bar scene. I suggested starting a cooking club, and we all agreed it would be a perfect way to spend a weekend night. The Girls

Our first meeting was last October. Since then, we have continued once a month. Here’s how it works:

 There is a standing group of 11 girls, all mid to late 20s. (We also have some additional guest appearances by other friends). The hostess plans the menu around a theme of her choice, does the grocery shopping (or delegates items), and invites the club into her home. The cost never exceeds $15 a person. A fair price for a gourmet dinner, with no rush to leave the table. She sets up stations in her kitchen for each course. The club breaks off into mini groups and tackles their recipe of choice. Wine, of course, is necessary and strongly encouraged. We cook, we eat, we laugh and share stories. We leave the hostess’s house with smiles and full bellies, and sometimes, leftovers.

The Cooking ClubTo be honest, at the beginning of this I would not have thought the club would have lasted this long. We’re all so busy now. Sometimes it feels like we need to make an appointment just to talk on the phone. Not everyone can come to every meeting, and that’s ok. It is still strong. This club has provided an incredible opportunity to establish new friendships and foster those that already existed.

I’d like to share our first menu with you. I hosted, and the theme was California Cuisine. I wish I had more pictures of the food, but I don’t. In fact, these pictures aren’t even from our first meeting. They were taken during my birthday dinner last February. We had a wine expert come in for a tasting, thus the excessive number of empty glasses. But it is the same group of girls, so that’s all that matters. Know that everything was delicious.

California Cuisine
October 24th, 2008
 
 
First Course
Cheeses with baguette and apple chutney
 
Pastureland Herb Gouda
Cypress Grove Midnight Moon
Berger de Roncastin
 
Salad
Fresh beet salad with orange vinaigrette and goat cheese
 
Entrée
Grilled rack of lamb with thyme
Mushroom risotto
 
Dessert
Crème brulee with fresh berries
 
 The girls
 
 Beet Salad with Goat Cheese and Orange Vinaigrette
 
3 pounds fresh beets
2 tablespoons raspberry vinegar
2 tablespoons fresh orange juice
3 tablespoons good olive oil
½ teaspoon sugar
1 ½ teaspoon salt
½ teaspoon pepper
½ cup small-diced red onion (1 small onion)
 
Cut tops of beets and place in large pot of salted water. Bring to a boil and simmer uncovered for 50 minutes to 1 hour. Drain and cool beets. Peel and dice beets into ½ inch cubes. Place in a bowl and add raspberry vinegar, orange juice, olive oil, sugar, salt, pepper, red onions. Mix well. Serve with crumbled goat cheese on top.
 
Grilled Rack of Lamb with Thyme
 
1 lamb rack
Thyme
Salt
Pepper
 
Heat charcoal grill. Cut lamb racks between bones. Spice each side with salt, pepper and thyme. Grill for 3-4 minutes per side. If charcoal grill is not available use a sauté pan on medium-high heat.
 The girls
Risotto with Mushrooms
 
3 ¼ ounces vegetable broth
3 tablespoons butter
2 tablespoons olive oil
2 shallots
1 pound assorted wild mushrooms
1 cub Arborio rice
½ cup dry sherry
½ cup freshly grated parmesan cheese
 
Melt butter with olive oil over medium heat. Add chopped shallots and sauté one minute. Add wild mushrooms; cook about 8 minutes or until tender. Add rice and stir to coat. Add sherry and cook until rice absorbs it, stirring frequently. Increase heat to medium-high. Add broth, ¾ cup at a time. Wait until each addition is absorbed until adding another. Stir frequently until all broth is absorbed. Stir in parmesan cheese and serve.
 
Crème Brulee
 
2 1/3 cups heavy cream
2/3 cup milk
¼ cup sugar
3 whole eggs
3 egg yolks
1 teaspoon vanilla extract
¾ cup light brown sugar
 
Preheat oven to 300 degrees. Sautee cream, milk and sugar to almost boiling. In a separate bowl, beat the whole eggs and egg yolks together. Whisk the heated mixture into the eggs and return to the saucepan. Cookover medium heat, stirring constantly withwooden spoon, until custard coats back of spoon. Remove from heat and stir in vanilla. Pour into custard dishes or shallow baking dish about 9 inches across. Place on pan in center of oven. Pour hot water into outer pan to come level withcustard. Bake 35-45 minutes. Remove, cover and chill. Sift brown sugar over top of custards. Flambé with culinary torch.